
5 signs you have a leaking sprinkler valve and how to fix it
As a homeowner, installing a landscape irrigation system can help you achieve the lush lawn and bright flower beds of your dreams. When you invest time and money into building a beautiful landscape, it’s wise to also invest in making sure that landscape stays cared for — like with a timed sprinkler system.
It’s also good to be aware that normal wear and tear on sprinkler systems can cause leaks. Things like excess water in your yard can be a sign of a leak in your sprinkler system.
A sprinkler valve leak is one common reason for sprinkler system problems. Let’s walk through the basic signs of a leaking sprinkler valve and how you can work to repair it.
What are the most common signs of a leaking sprinkler valve?
If you suspect a leak in your sprinkler valve or another part of your sprinkler system, be sure to repair it promptly. Leaks can waste a lot of water, affect the water pressure and lower the overall functioning of your irrigation system.
Here are the most common signs of a leaking sprinkler valve:
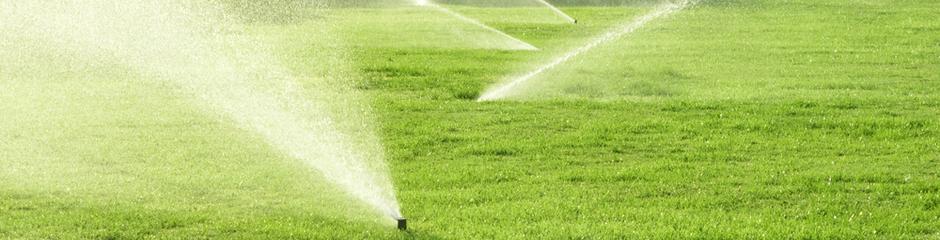
- Unusually wet grass: If it hasn’t been raining, but your lawn is soaking wet and the ground is saturated, you probably have a leak.
- Water-soaked driveway or walkway: If your driveway or walkways are wet, even in dry weather, the excess water could indicate a sprinkler system leak.
- Increased water bill: If your water bill has spiked, but your water usage is normal, part of your sprinkler system could have a leak. First, rule out the possibility of water leaking inside the home, such as from plumbing, a dishwasher or a washing machine.
- Low water pressure: Sprinkler heads that spray little water can indicate a leak in the system. Other issues that can cause low water pressure include a bad solenoid valve, a partially closed backflow preventer or a damaged water pipe. Ruling out these causes can indicate whether a leaking sprinkler valve is the issue.
- Water won’t turn off: There could be an issue with the sprinkler valve if the water doesn’t turn off completely or still leaks when shut.
Why is it important to fix leaking sprinkler valves quickly?
As with any mechanical system, preventive maintenance goes a long way in keeping your sprinkler system performing efficiently. A simple way to do this is by having your irrigation system professionally inspected each year, such as at the beginning of spring. You can also walk through your yard every month to see if the sprinkler heads appear clogged or damaged.
Any leak in your irrigation system can be costly, so having a plan to repair these issues immediately is crucial. Small leaks under 1 millimeter in diameter can lead to 6,300 gallons of wasted water a month.
Keep in mind that your water bill is not the only thing that can take a hit from a leaking sprinkler valve. Water puddling on your lawn can drown the grass and other plants. Wet soil has the potential to cave in, or the moisture could cause mushrooms or other fungi to grow. Low water pressure caused by the leak can prevent the sprinkler system from working properly, leading to irregular watering.
How can I fix my leaking sprinkler valve?
Depending on the type of leak, repairing a sprinkler valve can be a fairly simple DIY job. However, it’s important to keep in mind that a valve leak can also be a symptom of problems elsewhere in the irrigation system.
The first step in troubleshooting the cause of your leak is to locate the valve box. Most home irrigation systems are divided into zones. These zones feed sprinkler heads in different areas of the yard. Each zone has a valve that receives signals from a central controller telling it when to cycle on and off. The on and off cycles can cause wear and tear on the valves. Leaks can result if the valve components become worn or clogged.
Due to the underground nature of the system, homeowners sometimes have trouble locating the sprinkler valves. The valves are aboveground in some homes, near where the water source pipe connects to the house. More often, valves are in an in-ground valve box. The box is buried, but the top is generally at ground level and relatively easy to locate.
It can be challenging to find a valve box buried underground. Some homeowners dig up large areas of the yard searching for a buried valve box. If your valve box is buried, we recommend adding some type of lawn ornament nearby so you know where to locate it in the future.
Once you locate your valve box, you can inspect your valves and repair or replace them if needed. Let’s walk through some common issues with sprinkler valve leaks and how to fix them.
Fixing a sprinkler valve O-ring
One common cause of sprinkler valve leaks is a broken O-ring or seal. The O-ring is a small rubber circle that serves as a sealed connection between the valve power switch and the water source. If the O-ring becomes cracked or damaged, the water can leak through the connection point, potentially causing issues with the proper signaling to turn that particular zone on or off, and likely costing the homeowner quite a bit in wasted water.
To repair this, buy a new O-ring from the hardware store and replace the old seal with the new one. There are various sizes of O-rings; double-check to make sure you know which size you need for your system. Ensure there are no gaps in the seals so the connection is watertight. A YouTube video can offer guidance if this is your first attempt at this type of repair.
Fixing a visibly broken sprinkler valve
An irrigation valve can leak if it is damaged or when a loss of water pressure causes it to malfunction. If you notice any cracks or breaks in your valves, immediate action can help you save money from additional damage to your yard or system. You must replace a broken sprinkler valve.
Here are the sprinkler valve replacement steps to follow:
- Turn off the water supply.
- Shut off the power to the irrigation system and sprinklers.
- Remove the sprinkler valve.
- Clean and remove any debris in the system.
- Position the new valve and properly seal all connections.
- Restore the power and test your system.
Fixing a malfunctioning sprinkler valve
The problem with a valve is not always a worn-out component; sometimes, it’s just dirty. When dirt and debris get into a sprinkler valve, it can prevent it from opening and closing properly.
If this is the case, follow these steps:
- Unscrew the valve and inspect it.
- Clean the valve thoroughly.
- Use a brush if necessary to clear any dirt or sediment.
- Remove any debris from the connecting pipes.
- Flush the valve with clear water.
- Verify the valve works properly by turning on the water and checking if the sprinkler head has normal water pressure.
Fixing too much water pressure in the sprinkler system
When the water pressure in the sprinkler system is too high, it can cause the valves to leak. An oversize pump running for an extended period or having too many spray heads per zone can cause high water pressure.
There are a few fixes for this issue, depending on the root of the problem. One solution is to remove some of the sprinkler heads. In addition, don’t let the pump run for more than 12 hours in a row. Also, check that the pump is not oversize compared to the size of your irrigation system.
Other solutions include adding controls to reduce the frequency of watering cycles or moderate the water flow. Consider adding automatic cycling valves so water pumps won’t cycle on during times of the year when frequent watering isn’t needed. These devices use sensors buried in the soil that turn the water on and off based on soil moisture.
Another way to reduce water flow is to install a flow control valve. This valve prevents damage by restricting the amount of water flowing through the system. Consider hiring a plumbing or irrigation professional for these additions or repairs.
Fixing blocked lines
Dirt, rust and debris can clog the pipes of your irrigation system over time, potentially leading to leaks. A sprinkler head obstruction can interfere with water flow, resulting in leaks in the valves downstream from the clog.
Follow this process to correct the problem:
- Remove the sprinkler heads.
- Clear away any debris.
- Scrub away any dirt or excess rust.
- Replace the sprinkler head.
If the water doesn’t flow freely after cleaning the sprinkler heads, there is likely a clog in the irrigation line. A plumber or irrigation specialist will have the equipment needed to clear a clogged irrigation line.
Consider Cinch to help protect your home from costly repairs
Unexpected home-system breakdowns can stir feelings of stress and unease. We rely on plumbing and HVAC systems daily to keep our homes functioning and comfortable. Cinch Home Services is here to help.
Like most home warranties, Cinch protection plans do not cover sprinkler systems. We recommend regularly inspecting and maintaining your irrigation system as a homeowner to avoid expensive repairs.
If problems arise with your indoor plumbing, the Cinch Repair Plus Replace plan can help keep you covered. Have peace of mind that pricey breakdowns from normal wear and tear won’t break your bank. When a covered item malfunctions, give us a call and we’ll get you in touch with a professional, experienced and vetted service technician who can help solve your problem.
Reach out today for an instant quote!


