
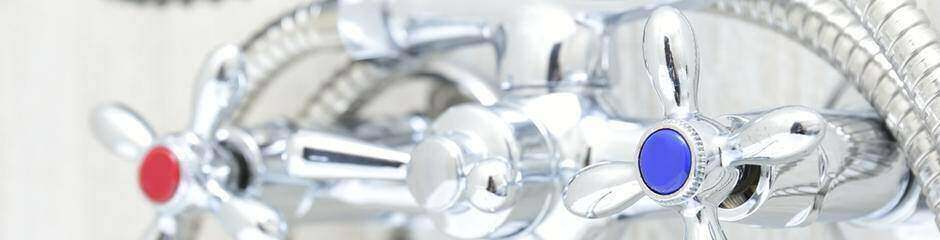
How to fix a leaky shower faucet
Everyone loves a hot shower, so it can be incredibly frustrating when yours isn’t working like it’s supposed to be. If your shower valve is leaking, you’ve got a problem. In addition to wasting water and causing a rise in your water bill, a leaking faucet could produce harmful mold or wood rot.
Before reaching out to a professional, though, consider whether you can fix the leak yourself. The purpose of this guide is to help you fix your faucet. We’ll go over the parts of your faucet, what can cause them to malfunction and show you how to replace them.
Common causes of a shower faucet leaking
Several things could cause your faucet to leak. It’s important to find out the cause of your leak to take the right action to repair it. In the following sections, we’ll discuss some common things that can cause your shower faucet to leak.
An O-ring/gasket is worn out
An O-ring is a little rubber circle located inside a faucet. It forms a seal and keeps water from leaking when the faucet is turned on or off. Over time, this rubber gasket naturally gets worn down, causing the faucet to leak.
A worn shower faucet cartridge
A cartridge is a valve inside your faucet with holes that help control the amount and temperature of the flow of water moving through the fixture. Cartridges have several small parts and O-rings that can deteriorate or get lost. This can cause issues like leaking or hot and cold water blending. Cartridges are only used for showers with one faucet handle.
Diverter valve issues
If water is coming out of the showerhead when it’s supposed to be coming out of the tub diverter or the other way around, you might need to replace your diverter valve. The diverter valve helps you divert water back and forth from your showerhead to your bathtub spout.
There are two main types of diverters you might have:
- Tub diverter. These are the most common. You’ll know you have one of these if you have to close the valve on the spigot.
- Three-valve diverter. These are less common, and you’ll know you have one of these if there are three valves on the wall — one for hot water, one for cold water and the other to control the diverter.
How to fix a leaky shower faucet
There are a lot of possible culprits that could be causing your faucet to leak. Before you can fix the issue, you’ll need to figure out the exact cause. This means you need to take apart your faucet and take a look at all its pieces.
Over the next few sections, we’ll go over how to remove your shower cartridge to examine all of its components. We’ll also show you how to replace the old cartridge when you’re done.
Turn off the water supply to the shower
Before you start, you’ll have to shut off the water to your shower. If you have a shut-off valve in your shower, you can use that. If not, you might have to shut down the water to your whole home. You might want to let everyone in your house know they’ll be without water for a time if that’s the case.
Note that you’ll want to test which valve is causing the leak. Turn on and off both the hot water and the cold water to identify which specific line is causing the issue.
Remember to use a towel or a piece of cloth to cover your shower floor and drain. You’ll be working with a lot of small pieces. Dropped tools can damage your bath, and you don’t want to lose anything. Open all the shower faucets so that any excess water can drain.
Remove the shower faucet
Different shower faucets are built differently. This could affect the process of taking off yours. When you take apart pieces of your faucet, remember to keep them organized so that you can reassemble them later on.
Use a flathead screwdriver to pop off the cover cap to your shower handle (if there is a cap). If there’s a screw under the cap, unscrew it and set it off to the side. Loosen the handle and remove it.
If the handle doesn’t come off easily, don’t pull on it too hard, or you could damage your pipes. A bathtub handle extractor will put pressure on the center of the stem or cartridge, allowing you to pull off the handle without causing damage.
You might also have to unscrew or pry off a decorative faceplate (escutcheon) if there’s one behind the handle. After that, take off or unscrew the sleeve around the faucet stem or cartridge. You might find that your valve has a locking clip or a bushing (a handle-fitting tool). If it does, take each piece off with a pair of pliers (needle nose) or use your screwdriver to pry them off.
Pull out the shower faucet cartridge
A single-handle shower faucet works using a cartridge. Latch onto the nut at the bottom of the metal stem with a deep well socket wrench. Screw off the nut and put it to the side. Pull out the cartridge. Loosen the cartridge using needle-nose pliers to get it out. If you have trouble getting the cartridge out, you can use a cartridge puller to make the job easier.
Pull out the shower faucet stem
A shower that has two or three handles will have metal stems under each handle instead of cartridges. If you have two handles, one is for cold, while the other is for hot. If you have three handles, the third one (in the middle) controls the bathtub diverter.
If you have a multiple-handle system, remember from the first step that you’ll want to test which one isn’t working before you turn off your water supply. Feel the leaking water. If it’s cold, the cold water handle is acting up. If the water is warm, the hot water handle isn’t working. If water is coming from the diverter, the middle handle is the problem.
You’ll still use a deep socket wrench to screw off the valve nut at the bottom of the stem, like you would if you were removing a cartridge. However, you can carefully pull the stem right out without loosening it. You’ll have to take the stem out for each handle you’re repairing.
Inspect for components to replace
When you get your cartridge or stem out successfully, look at the small parts to see what you need to replace. Some things to look for include:
- Signs of normal wear and tear or corrosion
- If any washers are bent to one side or deformed (metal washers can warp from the water easier than rubber washers)
- If the O-ring is damaged or warped
- Other pieces, like the sleeve and base nut, to see if they’re worn down
Remember that any replacement parts must be the same size as the old ones they’re replacing. If you see that the actual stem or cartridge is damaged or distorted, you might have to replace the whole thing. If you do, you’ll need the same model. Take the equipment with you to the hardware store or take a picture of it to make sure you get the right piece.
Soak the components in white vinegar
As you use your shower, natural mineral deposits gradually build up in parts of your faucet, which can cause damage and decrease your water pressure. That’s why it’s a good idea to soak any parts you plan on reinserting into your faucet in white vinegar for eight hours. The vinegar kills the natural buildup and keeps the faucet working longer. You don’t need to do this with new parts (new cartridges, stems or other parts).
Reinstall the shower faucet
After you’ve replaced everything that you need to, it’s time to restore your faucet. Put your faucet back together. Remember to restore the locking clip or bushing if your faucet has one. Piping thread sealant on threaded parts can help keep water from getting through. You can also apply a plumber’s putty or caulk to a faceplate before reinstalling it to protect it from leaks.
When you’ve put everything back the way it was, it’s time to test your faucet. Let the water run and see if the faucet is still leaking. Keep in mind that pipe thread sealant takes around a day to dry. If you use it, you will have to delay testing.
Call a professional
If you’re still having problems, you might have to call a professional plumber. DIY home improvement options are great for saving money, but they might not work for complicated plumbing issues. An expert will have the training and skills to get your shower running perfectly.
Limit costly bathroom repairs with a home warranty from Cinch
Plumbing issues are never fun. You use your plumbing every day, and you expect it to function properly. When it doesn’t, it can cost you money and your peace of mind.
Luckily, Cinch Home Services offers home warranty plans that cover bathroom systems like plumbing and water heaters. With Cinch, you can rest assured that your bathroom (and shower) will keep working when you need them to. Get a free quote today and find the right coverage for you.


