Homeowners guide to changing locks on a new house
Moving into a new home is an exciting and stressful time. Between the closing process and moving all your belongings, the last thing you need to worry about is the locks on your new home. However, changing your locks is one of the first things you should do once you’ve got your hands on those house keys. When the security of family members is a top priority, going the extra mile for home safety is important.
Changing the locks in your new home isn’t something that comes to mind when considering a move. Many may even consider it an extra hassle on top of the moving process. As it turns out, changing locks is an easy DIY project that can take less than a day to complete. Moreover, if safety is a concern, but you’re limited on time, you could hire a professional locksmith to replace the locks.
Either way, you’ll want peace of mind when you and your family spend the first night in your new home. To help you out, here is a step-by-step guide on how to change the locks in your new home.
Should you change the locks on a new house?
When purchasing a new home, it’s always a great idea to change the locks. You’ll want to maintain key control over your home as a means of security. Key control means knowing exactly who has a key and how many there are in circulation. If you keep your old locks, you don’t know who the previous owner gave a set of keys to.
Similarly, if your home has a security system or alarm, you’ll want to change the access code. You never know who the previous owner gave the code to. Being in control of your keys and codes is the biggest step in keeping out unwanted intruders.
If you are a renter or can’t change the locks in your home, rekeying is always an option. Rekeying uses an existing lock but changes the interior pins. This will allow you to change the keys and maintain key control. Remember to check with your landlord or rental company about rekeying your locks. Changing your locks and keys is the first step in home security.
What you’ll need to change your locks
Changing your locks is an easy DIY project. This home improvement project doesn’t take very long and only requires a handful of tools. However, deciding what types of locks you want for your home will take time. Make sure to do some research before heading to the hardware store.
Of course, the first step of any project is gathering your tools and information so everything runs smoothly.
New locks
Before starting your lock change project, you need some information.
- Take inventory of all the locks you are replacing. Make sure to count back doors, side doors, sliding doors, garage doors, and even shed doors — all the doors you need a key for.
- Write down the types of locks you will need. Are the doors secured with only a deadbolt or knob lock? Do they use both?
- Take note of the brands of locks you currently have. Replacing locks is easier when you stick with the same brand. Generally, a new lock of the same brand will fit in the same space as the old lock.
- Are you upgrading your locks for security purposes? If you plan on upgrading to a more secure lock, whether it be a smart lock or adding a deadbolt, make sure you take note of any other tools or equipment you might need for installation. This can include an app on your phone or tablet.
- Do you plan on using multiple keys, or are you installing a one-key system? A single key system can be more convenient for your family. You can purchase multiple locks that use the same key from certain brands. They are commonly labeled as “keyed alike” or have a matching code listed. Otherwise, you will have to take rekeying your new locks into consideration.
Having all of this information will help make your shopping experience much smoother. You can find everything you need for this project, including several different lock options, at your local hardware store, big-box store, or even online.
Measuring tape
Use a measuring tape to ensure that your new lock fits into the existing space. Locks tend to come in standard sizes; however, there is always the chance that a new lock won’t fit. So, always take proper measurements before removing or installing new hardware.
Measuring is especially important when replacing a deadbolt. While most deadbolts are adjustable, you’ll want to make sure you’re in the right size range when shopping. Measure the spacing between the existing lock and the doorknob lock, as well as the height of the faceplate and diameter of the deadbolt. The last thing you want is for the bolt to not lock inside the faceplate because the measurements were wrong.
Screwdriver
A screwdriver is the most critical tool you need to change your locks. Most locks will need a screwdriver to install and remove. To know which kind — flathead or Phillips head — you must check the instructions for your new lock.
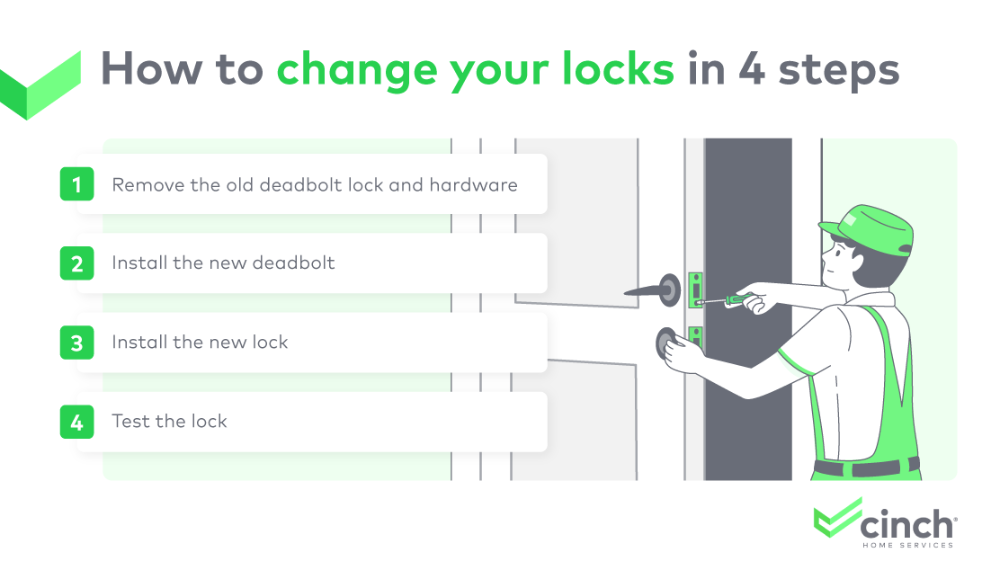
How to change your locks in 4 steps
Replacing a lock is easy — a beginner DIY homeowner can do it. But if you don’t feel confident in your DIY abilities or want to put your home’s security in the hands of a professional, you can always put your trust in a locksmith.
For those who want to replace their locks themselves, here’s how to do it in four easy steps.
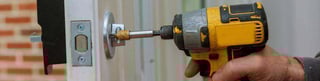
1. Remove the old deadbolt lock and hardware
First, it is out with the old. Removing the old locks will require a screwdriver. Make sure you are ready to install the new lock before removing the existing one.
- Locate the screws on the sides of the lock (usually the inside plate) and remove them.
- Remove the outside plate.
- Open the door, and remove the plate on the side by unscrewing it.
- Remove the inner parts of the lock that you can see.
2. Install the new deadbolt
Now in with the new. Installing the new lock should be easy. If you have any issues, call a professional and reinstall the old lock. Don’t leave your home without a lock.
- Read the installation instructions for your new deadbolt.
- Insert the new deadbolt into the same space as the old one, making sure it is right side up.
- Use the provided hardware to secure the deadbolt in place.
3. Install the new lock
It’s time to install the most important part, the lock itself. Take your time and follow the manufacturer's instructions carefully.
- Fit the key, locking part of your new deadbolt into the correct space.
- Fit the bolt part into the correct space.
- Secure both parts according to the instructions provided.
4. Always test the lock
Test it. Make sure you test the deadbolt with the door open. Use both the key and turning mechanism to test that the deadbolt locks and unlocks. Then close your door to make sure that the lock closes securely. Test that your door will not open when the deadbolt is locked.
Here’s when to call a professional
While changing your locks is an easy task, there can be complications. Sometimes you may need to call in a professional locksmith to help.
- Old house. Due to their age, older homes may not come with standard-size deadbolts or locks, making it difficult to find replacements for vintage locks. A professional can help with rekeying your home so you don’t need a replacement.
- Master key system. If you want the convenience of one key for all of the doors in your home, a professional locksmith will have the training to install these complicated lock systems.
- Confidence. If you are not confident with replacing the locks on your home, then call a professional. They will make sure that your home is safe and secure.
How much does it cost to get your locks changed?
The cost of changing your locks will vary from project to project. If you plan to DIY, the price will depend on the types of locks you purchase and the number of locks you need to replace. The average deadbolt lock kit costs between $35 to $50. However, some specialty locks, such as smart locks and high security locks, can cost upward of a few hundred dollars.
If you hire a professional locksmith to install your new locks, plan to add between $80 to $200 in labor costs on top of the cost of the locks. The cost of the locksmith may also vary depending on the complexity of the locking systems installed.
Is it cheaper to rekey or replace locks?
If you decide not to change your locks, you can choose to rekey locks instead. Rekeying means keeping the current locking mechanisms but changing the interior pins to open with a different key. This will ensure the old key no longer works. Rekeying works well in older homes with old locks or if you want one key to work with all the doors in your home.
But in terms of cost, should you rekey or replace your locks? Handy homeowners can attempt to rekey themselves using brand-specific rekeying kits available at hardware stores. These kits cost between $15 and $25. If you don’t feel comfortable rekeying your home, a professional locksmith can do it for you. This locksmith service costs between $80 to $160.
However, there is a third, less conventional option. If you remove the lock from your door, you can take it to a hardware store or key shop where a technician can rekey it. This usually costs between $5 to $10. Just don’t leave your home without locks or unsecured while you are away.
Protect all your home systems and appliances with Cinch
Now that you have protected your home from intruders with your new locks, it’s time to protect it from unexpected costly repairs. Cinch Home Services provides home warranty plans that come in handy when appliances act up or home systems are on the fritz. Don’t let maintenance and repairs stress you out; save your DIY skills for home improvement and renovation projects.
With three different plans to choose from, you can cover all aspects of your home. Each plan offers reduced repair costs, discounts on brand-name appliances, and add-ons for your unique home.
When something goes wrong, filing a warranty claim with Cinch is a smooth and easy process. Cinch sets up an appointment with a verified technician at your convenience. Every technician is knowledgeable and equipped with the skills to get the job done.
With a 180-day workmanship guarantee on covered repairs and 40-plus years of experience, Cinch home warranties are the perfect addition to your home. Get a quote today!