How to clean and maintain a ceiling showerhead
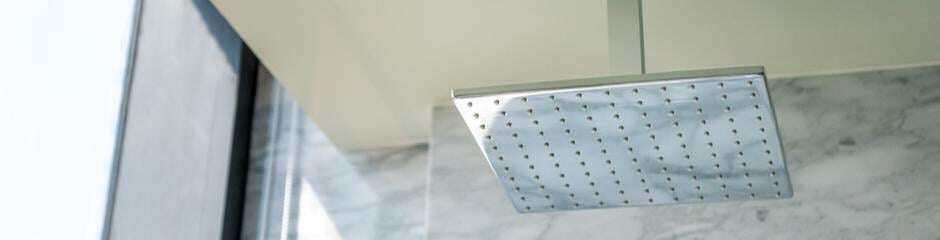
Ceiling showerheads are a popular item in bathroom design, with manufacturers ranging from Moen to Kohler. If you have tried one, you can see why. Rather than constantly turning around to get hit with the stream of water with a regular wall-mounted showerhead, a ceiling-mounted showerhead douses the entire body at once. It creates an effect that feels like standing in a gentle rain or enjoying a spa treatment. It’s such a relaxing stress reliever after a long day.
Despite their prominent appearance in modern showers, homeowners often forget to clean these round or square rain showerheads. They concentrate their cleaning efforts on toilets, tubs, glass walls and tiles, forgetting what is right above their heads.
Ceiling showerheads look less shiny and beautiful and work less effectively as a result. So, it’s a good idea to clean your rain shower system regularly.
Why you should clean your ceiling mount showerhead regularly
Whether your rainfall showerhead (or waterfall showerhead) is stainless steel, polished chrome finish, brushed nickel, matte black, solid brass, oil rubbed bronze, plastic or some other material, if it’s exposed to too much hard water (full of minerals, such as calcium, magnesium, etc.), it can develop unsightly limescale. This is calcium carbonate, a tough, chalky white deposit that remains after hard water evaporates. The harder the water, the more unsightly limescale residue that’s left behind.
The mineral deposits can take away a thermostatic or high-pressure showerhead’s shine, coarsen its appearance and even clog its nozzles. The latter can reduce pressure — lowering its flow rate by gallons per minute (GPM) — and create uneven spray patterns, decreasing the quality of the shower experience.
If these aren’t reasons enough to convince you to clean your ceiling showerhead, there are also health considerations. Constantly wet showerheads (and this also goes for handheld showerheads of any type of shower faucet) are breeding grounds for mold, mildew, bacteria and other germs. Some of the bacteria are harmless, but other bacteria might be linked to lung infections. The black gunk sometimes found around showerheads may contain an infectious microbe that’s dispersed in the air with the running water and inhaled by the bather. Without regular cleaning, you could be at risk.
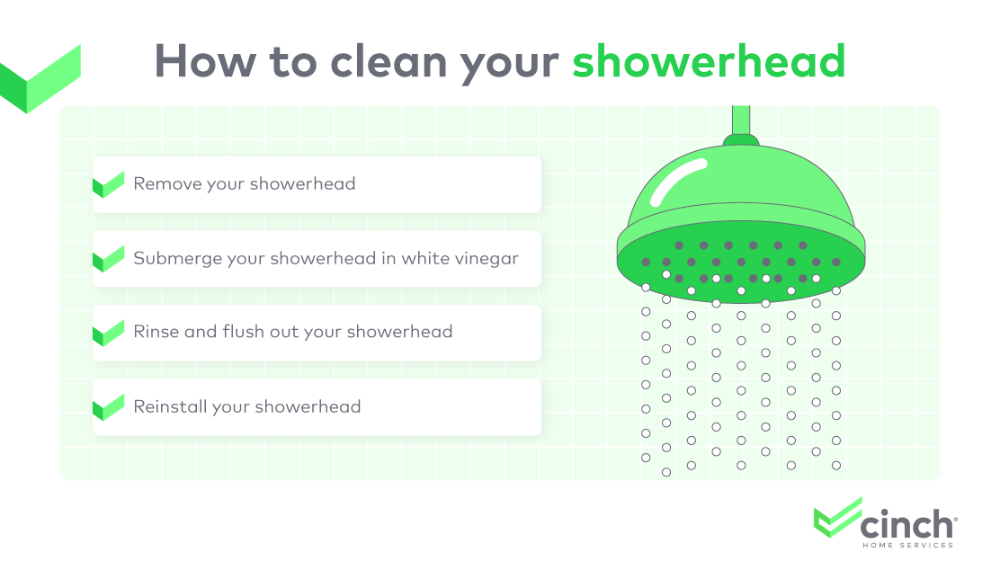
How to clean your showerhead
It’s a good idea to clean your ceiling showerhead at least once a month. If you have time to clean it once every two weeks or weekly, that’s even better. With regular cleaning, you’ll cut back on the mineral buildup, and cleaning the showerhead will be easier. This is true whether you have a standalone shower or a multi-function combo with bath, body jets and dual showerheads.
When you put together your bucket of cleaning supplies, it’s tempting to include some items that you think are naturals for the job. However, some commercial cleaners may contain harsh chemicals that can damage the finishes of rainfall showerheads. For the same reason, you shouldn’t use coarse brushes for cleaning. Some cleaners also affect the bacteria levels in the showerhead. In some cases, even bleach can increase the levels of bacteria found in shower set heads by as much as three times.
Instead, to make your ceiling-mounted showerhead look sparkling new and free of clogging minerals, your go-to cleaning kit should include:
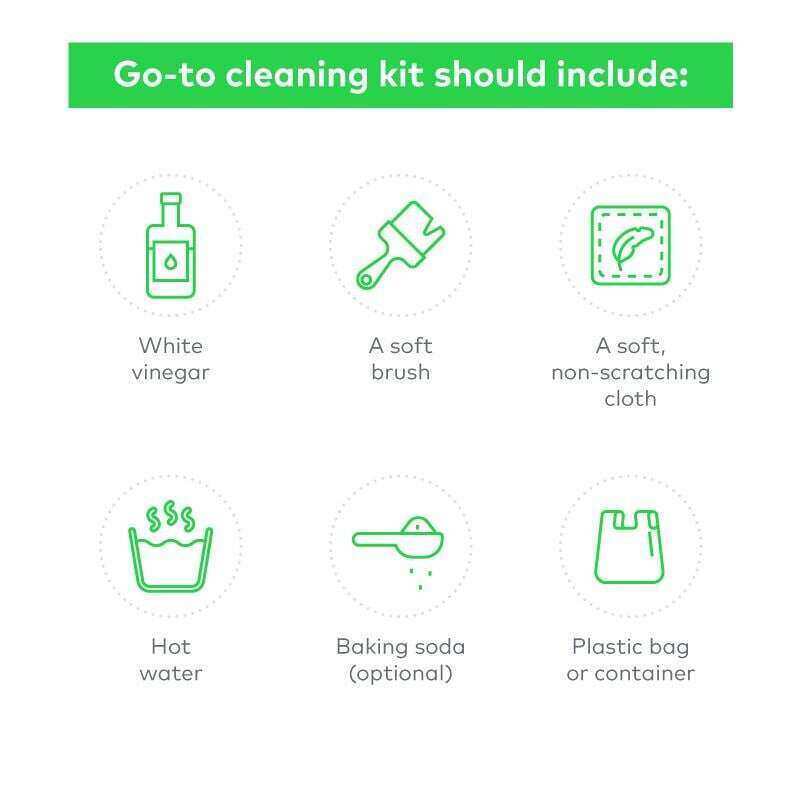
- White vinegar - The acidic properties of white vinegar helps it to break down mineral deposits which clog the water holes of your ceiling shower head.
- A soft brush (or an old toothbrush) - A soft brush or toothbrush can be used to scrub the vinegar on your showerhead and rub off mineral deposits.
- A soft, non-scratching cloth - Use this to wipe away excess deposits or cleaning solution.
- Hot water - Use hot water to rinse off the showerhead.
- Baking soda (optional) - Baking soda can also help break down tough mineral deposits and it has a light abrasive effect to rub off deposits when scrubbing.
- Plastic bag or container - A plastic bag or container can be filled with vinegar and hung on your showerhead with the showerhead submerged in the solution. This allows it to soak in the solution, breaking down mineral deposits so that they come off easier when cleaning.
If the mineral deposits on the showerhead are too entrenched and aren’t removed by the vinegar solution, you also have the option of using a powerful, specialized limescale cleaner from the store. But be careful using it, especially if you are cleaning your showerhead in a fixed position above you. You won’t want the cleaner splashing back down in your face and eyes. To avoid this, you might want to consider wearing safety goggles or some other kind of eye protection, as well as plastic gloves.
Remove your showerhead
To easily clean your ceiling mount showerhead, first, remove it from its ceiling mount or wall mount. Most of these overhead showers allow you to detach the heads by twisting them out of their base.
If the ceiling mount shower arm doesn’t easily detach from the shower flange, or if you prefer to clean it in place, there’s a way to accommodate this as well, using a bag or other container filled with cleaning liquid attached to the showerhead (but more on this later).
One thing to note is that if you have a specialty showerhead, you may want to consult the manufacturer or check the manual before removing the showerhead. Some specialty showerheads require a professional to come and disassemble the showerhead and clean specific parts. It’s best to know this ahead of time before you take the showerhead down.
Submerge your showerhead in white vinegar
Once you remove the ceiling showerhead, prepare a bowl or bucket filled with enough distilled white vinegar to cover the head. (Malt vinegar isn’t as effective as white vinegar, and brown vinegar may leave stains.) You can also do a mix of hot water and vinegar. (More vinegar and less water make for a more powerful unclogging solution.)
Leave the showerhead to soak for at least 30 minutes, but preferably a full hour. If your ceiling showerhead is heavily limestone-encrusted, leave it in the solution even longer, for several hours or even overnight. (However, brass showerheads should only be left in for about 30 minutes and no longer.)
You can also step up the process by adding a couple of spoonfuls of baking powder to the vinegar or water-and-vinegar solution. This will cause it to bubble up with a foam containing carbonic acid, a natural cleaning agent.
Another short-term solution is to simply massage the showerhead’s nozzles if they’re rubber. You should be able to increase the stream flow by dislodging debris. You can also use a toothbrush.
Rinse and flush out your showerhead
After you finish soaking your rainfall showerhead, use a toothbrush or soft brush to scrub away any remaining residue. You can also run some of the vinegar solution through the showerhead via the pipe attachment, draining it into the sink or shower to clear any residue inside.
Another option is to use your soft brush or toothbrush to scrub off any remaining mineral residue on the outside of the ceiling showerhead. After a final rinse, use a soft, non-scratching cloth to dry and polish the showerhead to a shiny buff, so it looks as good as new.
Reinstall your showerhead
Finally, twist the shower arm back onto its base, ensuring you have a tight seal so that water doesn’t come out at the joint. Then run water through the shower to remove any final debris and cleaning solution from inside the shower parts, so you won’t wind up smelling like vinegar after your next shower.
Cleaning a fixed rainfall showerhead
The process of cleaning a fixed showerhead is very similar to cleaning a detached one. In this case, you’ll take a plastic bag big enough to fit over the showerhead and fill it with water and vinegar, or water, vinegar and a couple of teaspoons of baking soda.
Fit the bag over the showerhead, ensuring there is enough liquid in the bag to cover it. Then secure the bag in place with a string, a cord or electrical tape, leaving it in place for as long as you think the showerhead needs. It could be any amount of time ranging from 30 minutes to overnight.
After removing the bag and cleaning any excess limescale with a soft brush or toothbrush, run the shower slightly to get rid of any leftover vinegar solution. Finally, use a soft cloth to polish the showerhead.
Soften your hard water in the bathroom shower
To decrease how much hard water and limescale build up inside your showerhead, look into installing a water softener for your entire home. These devices range in cost and often require professional installation, depending on which one you choose.
Another solution for your ceiling showerhead is to get an inline showerhead filter, which has replaceable filters that can get rid of chlorine, heavy metals, bacteria, fungi, scale, sediment and more.
Avoid expensive bathroom repairs with a home warranty from Cinch
Cleaning your ceiling showerheads so that they are free of limescale — which can clog water flow, reduce water pressure and serve as a breeding ground for health-threatening microbes — should be part of your larger goal of keeping your home’s major appliances and systems in good working order.
Serving nearly 1 million customers, Cinch Home Services is here to help you with this goal with our award-winning home protection plans. As you descale your rainfall showerhead, you can rest assured that your bathroom appliances and systems — including toilets, whirlpool/jetted bathtubs, water heater and plumbing — are proetcted.
Contact Cinch to get a free quote and enroll in a home warranty plan today to ensure that the protection you need doesn’t take you to the bath.


